The Pros & Cons of a Penny Tile floor DIY
You’ve all seen them, the glamorous photos of a penny tile bathroom floor. They are sure beautiful. But is the work really worth the glamor? I took inspiration from Pinterest of those that have created patterns with penny tile and decided on the one that would fit my bathroom design best.
I knew I wanted to do something creative and this seemed to be the perfect project to do just that. Let’s get into the process I took and my PROS & CONS to this DIY project.
*Find all the links to the bathroom items / items used for the flooring right here.
THE BEGINNING
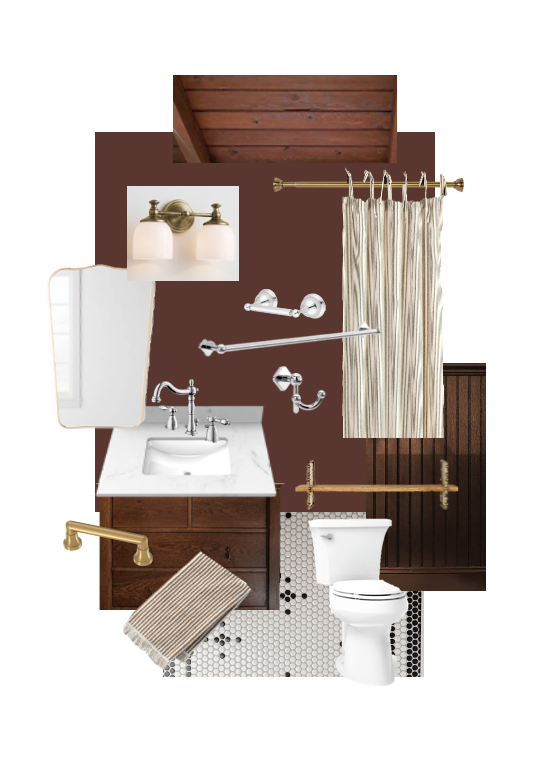
I started by staring at the old, boring basement bathroom, imagining what it could be! I created different design plans for it, but ultimately ended up with the plan below.
PRO
Create a design plan, or work with an interior designer so you have a visual (mood board, partial room design or a full room design), along with a shopping list and color palette. It WILL make your life so much easier once you start the project.

Okay, now that we have the vision, the shopping list and the to-do list, it’s time to get srarted!
DEMO & TESTING


CON
The existing floor was a laminate floor and it was bubbling in some places. So, it had to be torn up. This left a lot of glue/paper stuck to the concrete floor that needed to comes off. I spent a lot of time scraping and using the heat gun to get the extra stuff off the floor before laying the tile.
PRO (& a CON?)
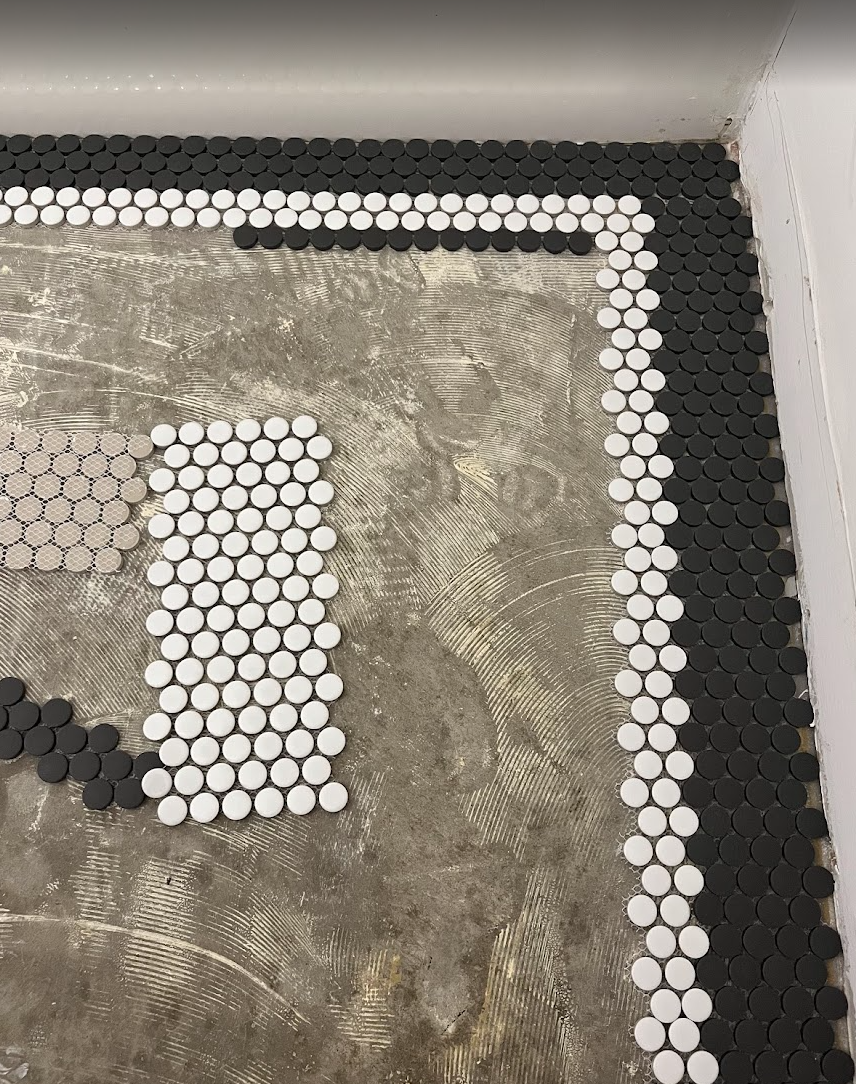
With the bathroom empty and tile purchased, I was able to test out the pattern. It’s important to dry lay the pattern - preferably on the entire floor so you know exactly how it’s going to turn out. This is something I learned the hard way. I dry laid the tile border and then about 1/3 of the inside to get an idea of how it was going to go. But, what I didn’t think about was that the room IS NOT PERFECTLY STRAIGHT. No room is exactly the same size and perfect on all sides. So when I was mortaring the tiles for real and I got to the end, the rows were a bit wider and I had to adjust on the fly. OOPS!
Removing the glue and dry laying the tiles took me an entire day. Maybe 8 hours?

MORTAR (MISHAP?)
The first photo is showing you my 1/3 dry lay - which I thought was perfect and I was good to go.
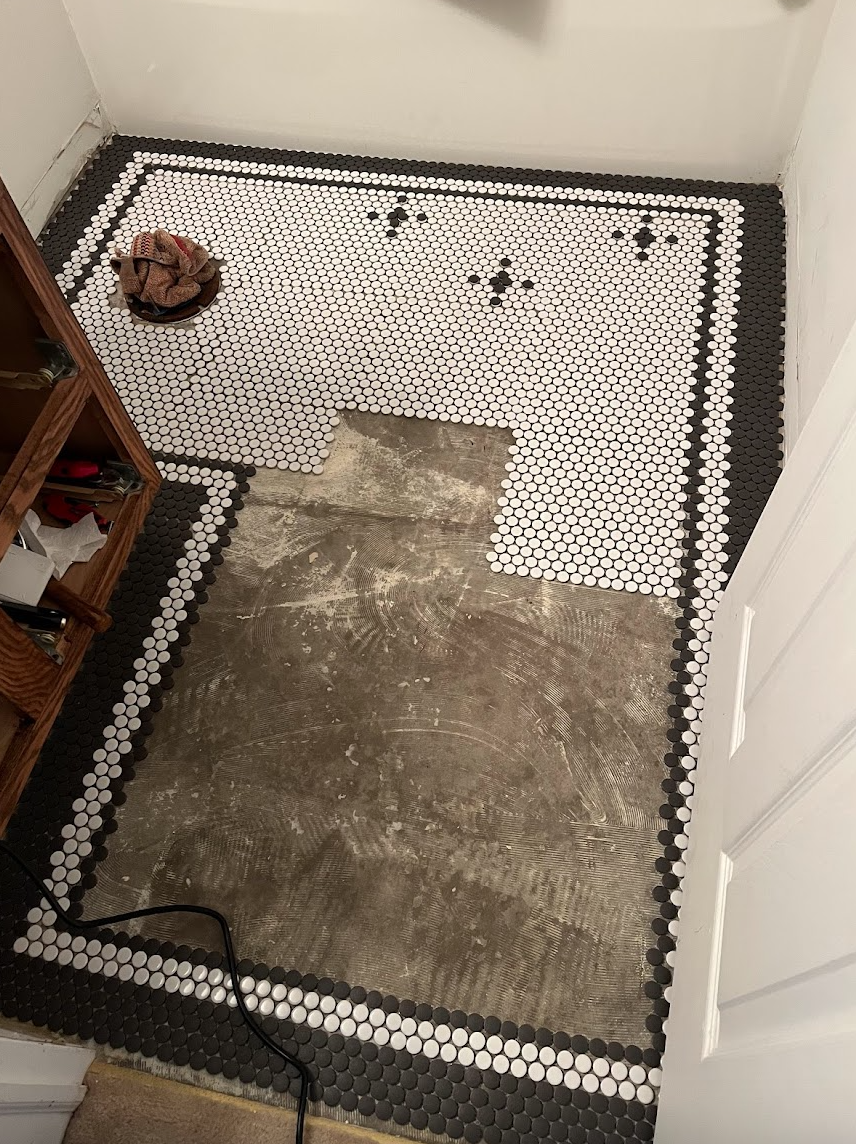
The second photo is the floor completely finished with the mortar. In the photo, you can really see the “seams” of the penny tile squares. It didn’t look like this in real life. But, you can also see the slight adjustments I had to make when I realized the room was not indeed perfect.
I started to get VERY frustrated during this step in the process.
The mortar has to be perfect - and I don’t really do well with perfection. I’m more of a “done is better than perfect” kind of gal. It has to be the right consistency (yes, be sure you buy one of those mixer drill attachments to mix it up in a large bucket). It has to sit for the right amount of time. And then, it can’t sit for too long or is dries out.
CON(s)
You MUST do the mortar/tile in sections. It dries out quickly and you don’t want that to happen. So, apply a little bit at a time, put your tile down, then do another section.
The penny tile is especially frustrating because the tiles are SO TINY that if you put too much mortar on the floor and push the tile down (with your grout float), the mortar will pop up in the cracks. You want this to happen a little bit. But, not so much that it comes up as high as the tiles. THIS WAS DIFFICULT.
I eventually learned that you should “back mud” the tiles first (put some mortar on the back on the tiles) and mortar on the floor, and then push them down. This helps to ensure all of the tiles get properly covered. Trust me, I also learned this the hard way.
After the mortar dried, I had several that did not fully adhere because they didn’t have enough mortar on them - the ones that did this were mainly ones on the edge of a “square” (the penny tile sheets come in a square).
And remember when I said that you don’t want the mortar to come up too high through the cracks? Well, if that happens, but sure to clean it out when the mortar is still wet. I was so frustrated with it that I just left it and then regretted it later.


This first photo is an example of what it looks like when the mortar is up too high/on the tiles and dried. DON’T DO THIS!
*I ended up going back in with a tiny little tool and scraping in between several tiles to get the extra mortar out of the grout line.
The next two photos are example of the pattern dry lay.

FULL ROOM DESIGN
Multiple images showing you what YOUR space could look like with actual items.
Shopping list of items/options.
Color palette.
Room layout options.
My design guide full of advice, suggestions, etc.
I’d love to hear more about the space you’re working on. I’ll do all of the planning for you - less stress, save time and save money.
Contact me today!
DESIGN
PRO
You have complete creative freedom over the design. With penny tile being so small, it’s easy to manipulate the tiles to get the perfect design for your space. I made the border fit the room (I put an extra row of black anywhere where there would be trim so it ended up looking like 3 rows) and then moved those little stars all around before I landed on the perfect design.
You want them to be spaced evenly, but also have to work around the toilet and the size difference in the room. Being able to test it out until you get it right is fun and a blessing!


PRO
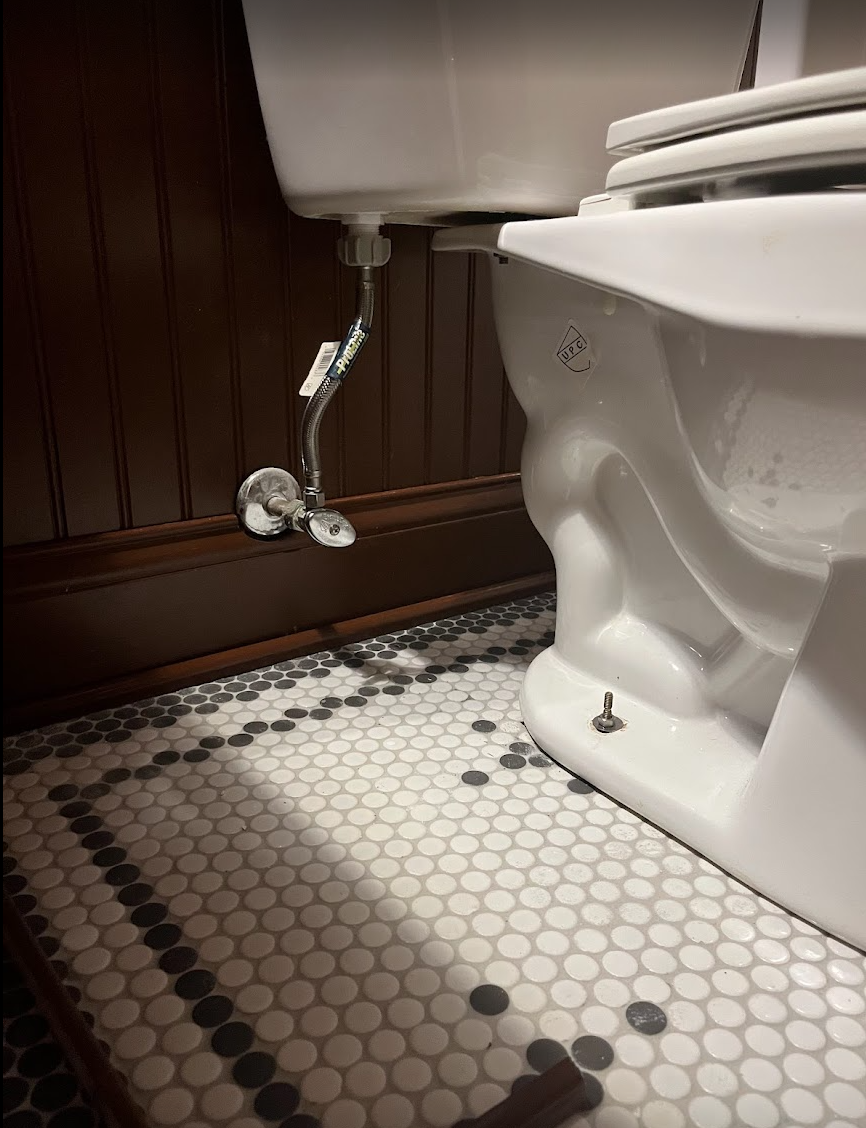
When you have the design figured out, it’s pretty easy to pop off the existing tiles and replace them with the new (black) tiles. I used a little chisel. Be sure there isn’t a ton of mortar on the floor otherwise the new tiles won’t lay flat. The netting made that a little difficult, but wasn’t too much of a hassle.
CON
It was during this time that I figured out there were several tiles not fully adhered. When I started to pop one off to replace it with the black, some around them were noticeably loose. So, guess what I did?
I HAD TO TAP ON EVERY SINGLE TILE IN THE ROOM AND LISTEN TO THE SOUND IT MADE.
If it was fully adhered with mortar, it would make a deep tap sound. If it wasn’t it would sound different. And that sound haunted me.
At this point I was like 30 hours in on the project and I wanted to cry.
I ended up having to pull up and replace something like 30 loose tiles. NOT my idea of a good time.


GROUT
PRO
Once I was finished fixing all the loose tiles, it was time to think about grout. The grout color can be a game changer for this floor! Here’s a rule of thumb for grout:
If you want the tiles to blend together, use a similar color grout to the tiles (white tile/white or grey grout). If you want each individual tiles to stand out, use an opposite color grout from the tile (black/white).
This gets a little tricky when you have 2 different color tiles on the floor.
I tested out a light gray color on the white tiles and then on the black tiles behind the toilet/trim (a place that I could easily cover up if needed). I ended up liking the color, so I went all in.


See how the light grey grout softened the white tiles and made the black ones stand out? Perfection!
CON
This was also the point when I realized the little imperfections that are on the floor are going to be noticeable. I mean, if you walked in there today you’d probably never really noticed unless you really studied it. And honestly, it wouldn’t be a work of art made by me unless there was some character, right?

FINISHING IT OFF
CON
The grout mess.
Okay, back to the grout for a second. After you put it in between the tiles (make sure you drag the grout float on an angle side to side), you have to let it sit for 5ish mins and then come back with a clean damp sponge and wipe it clean. Make sure you have access to a couple buckets with clean water. With larger tiles, this is a lot easier because there’s more tile surface and less grout lines. But with the penny tile, there’s a lot of grout lines between little tile surfaces.
Cleaning it was hard, but also, I didn’t want to wipe too much because I wanted the grout to stay on top of that high mortar that I didn’t get off between the tiles back on the mortar step. Ugh.
PRO/CON
The good news is, the grout covered my mortar mishap in most areas. The bad news is, it left a mess on top of the tiles when it dried since I didn’t wipe it all the way when it was wet.
When everything was dry, I went back through with a chisel and scrapped the tops of the tiles/used a wet cloth to get as much off of each one as I could.


FINAL PRODUCT
Of course, it’s all worth it in the end. But, I spent nearly 40 hours on the floor alone. That’s a lot of hours. Too many probably.
PRO
It’s truly beautiful and a focal point of the space. It really ties together the rest of the room and completes the design! Let’s see a before and after one more time…


Will I penny tile a floor again? Time will tell I guess.
Want to start a project in your home, but unsure where to start? No time to plan? I’d love to help!
LINKS for the BATHROOM
All bathroom items/flooring materials used are linked right here!